Watching Alarm Records
About the Alarm System
The Cordatus Alarm System provides quick access to records of events detected in real-time by the AI Platform. Unlike normal recording playback, this system works in an alarm-focused manner.
What is an Alarm?
An alarm is an important event detected by AI models while analyzing camera streams:
- Person Detection: Human detection in a specific area
- Vehicle Detection: Vehicle entry, parking violations
- Motion Detection: Movement in specific areas
- Object Detection: Custom object detection with specially trained models
- Behavior Analysis: Abnormal behaviors such as falls, fights
How is an Alarm Record Created?
- A Job is created on the AI Platform
- The Job runs the AI model on selected cameras
- When the model makes a detection and alarm rules are triggered:
- A screenshot of the trigger moment is saved
- Detection data (bounding box, label, confidence score) is stored
- The relevant video segment is marked
- All this data is stored in the alarm database
Use Cases
- Quick detection and investigation of security breaches
- Evaluation of AI detection performance
- Post-incident forensic analysis
- Monitoring operational anomalies
Accessing Alarm Records
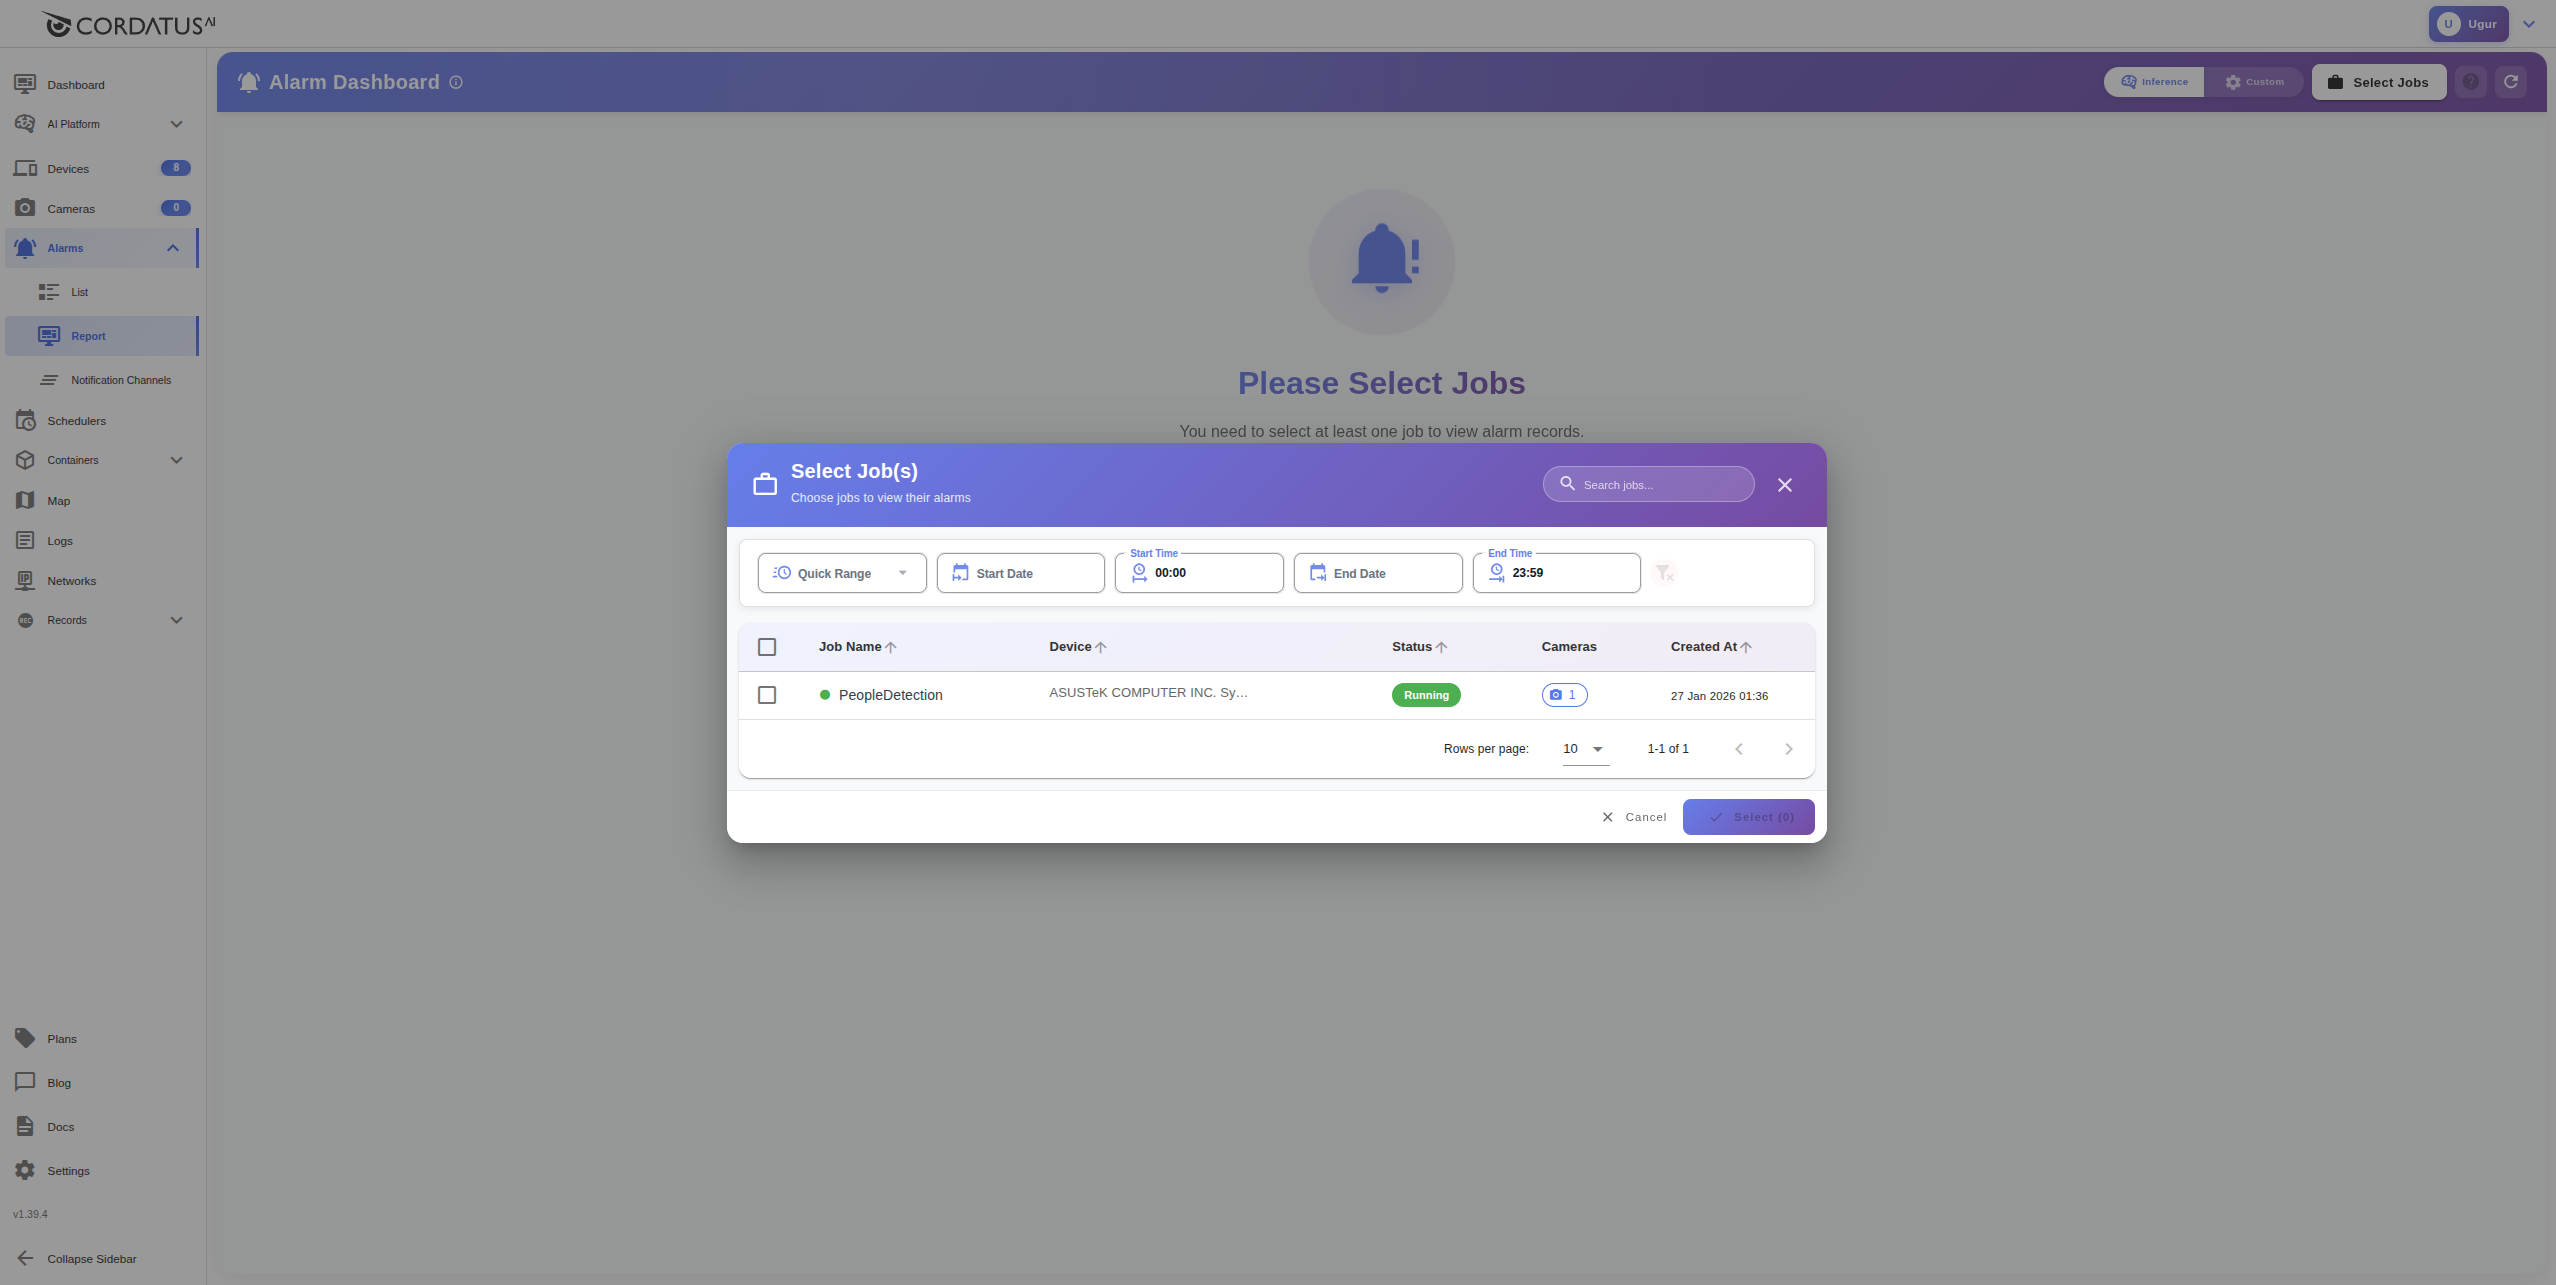
Click on the Reports option from the Alarm section in the right menu. The alarm records monitoring screen will open.
Job and Time Selection
- Click the "Select Job" button
- Select the AI jobs you want to monitor from the opened window
- Specify the date and time range:
- Quick Ranges: Today, Yesterday, Last 7 Days, Last 30 Days
- Custom Range: Manually enter start and end date/time
- Click the "Apply" button
The system automatically:
- Connects to devices associated with selected jobs
- Loads triggered alarms
- Places them on the timeline and alarm table
Alarm Monitoring Interface
Grid and AI Drawings
Selected cameras are displayed in a grid layout. In alarm mode, AI inference drawings are shown on the video:
- Detection Boxes: Colored bounding boxes around detected objects
- Labels: Object name and confidence score (e.g., "Person 95%")
- Alarm Regions: Visual representation of the trigger area
- Category Colors: Different object types are shown in different colors
AI drawings are active by default. Alarm drawings can be toggled on/off from the header in the upper right corner.
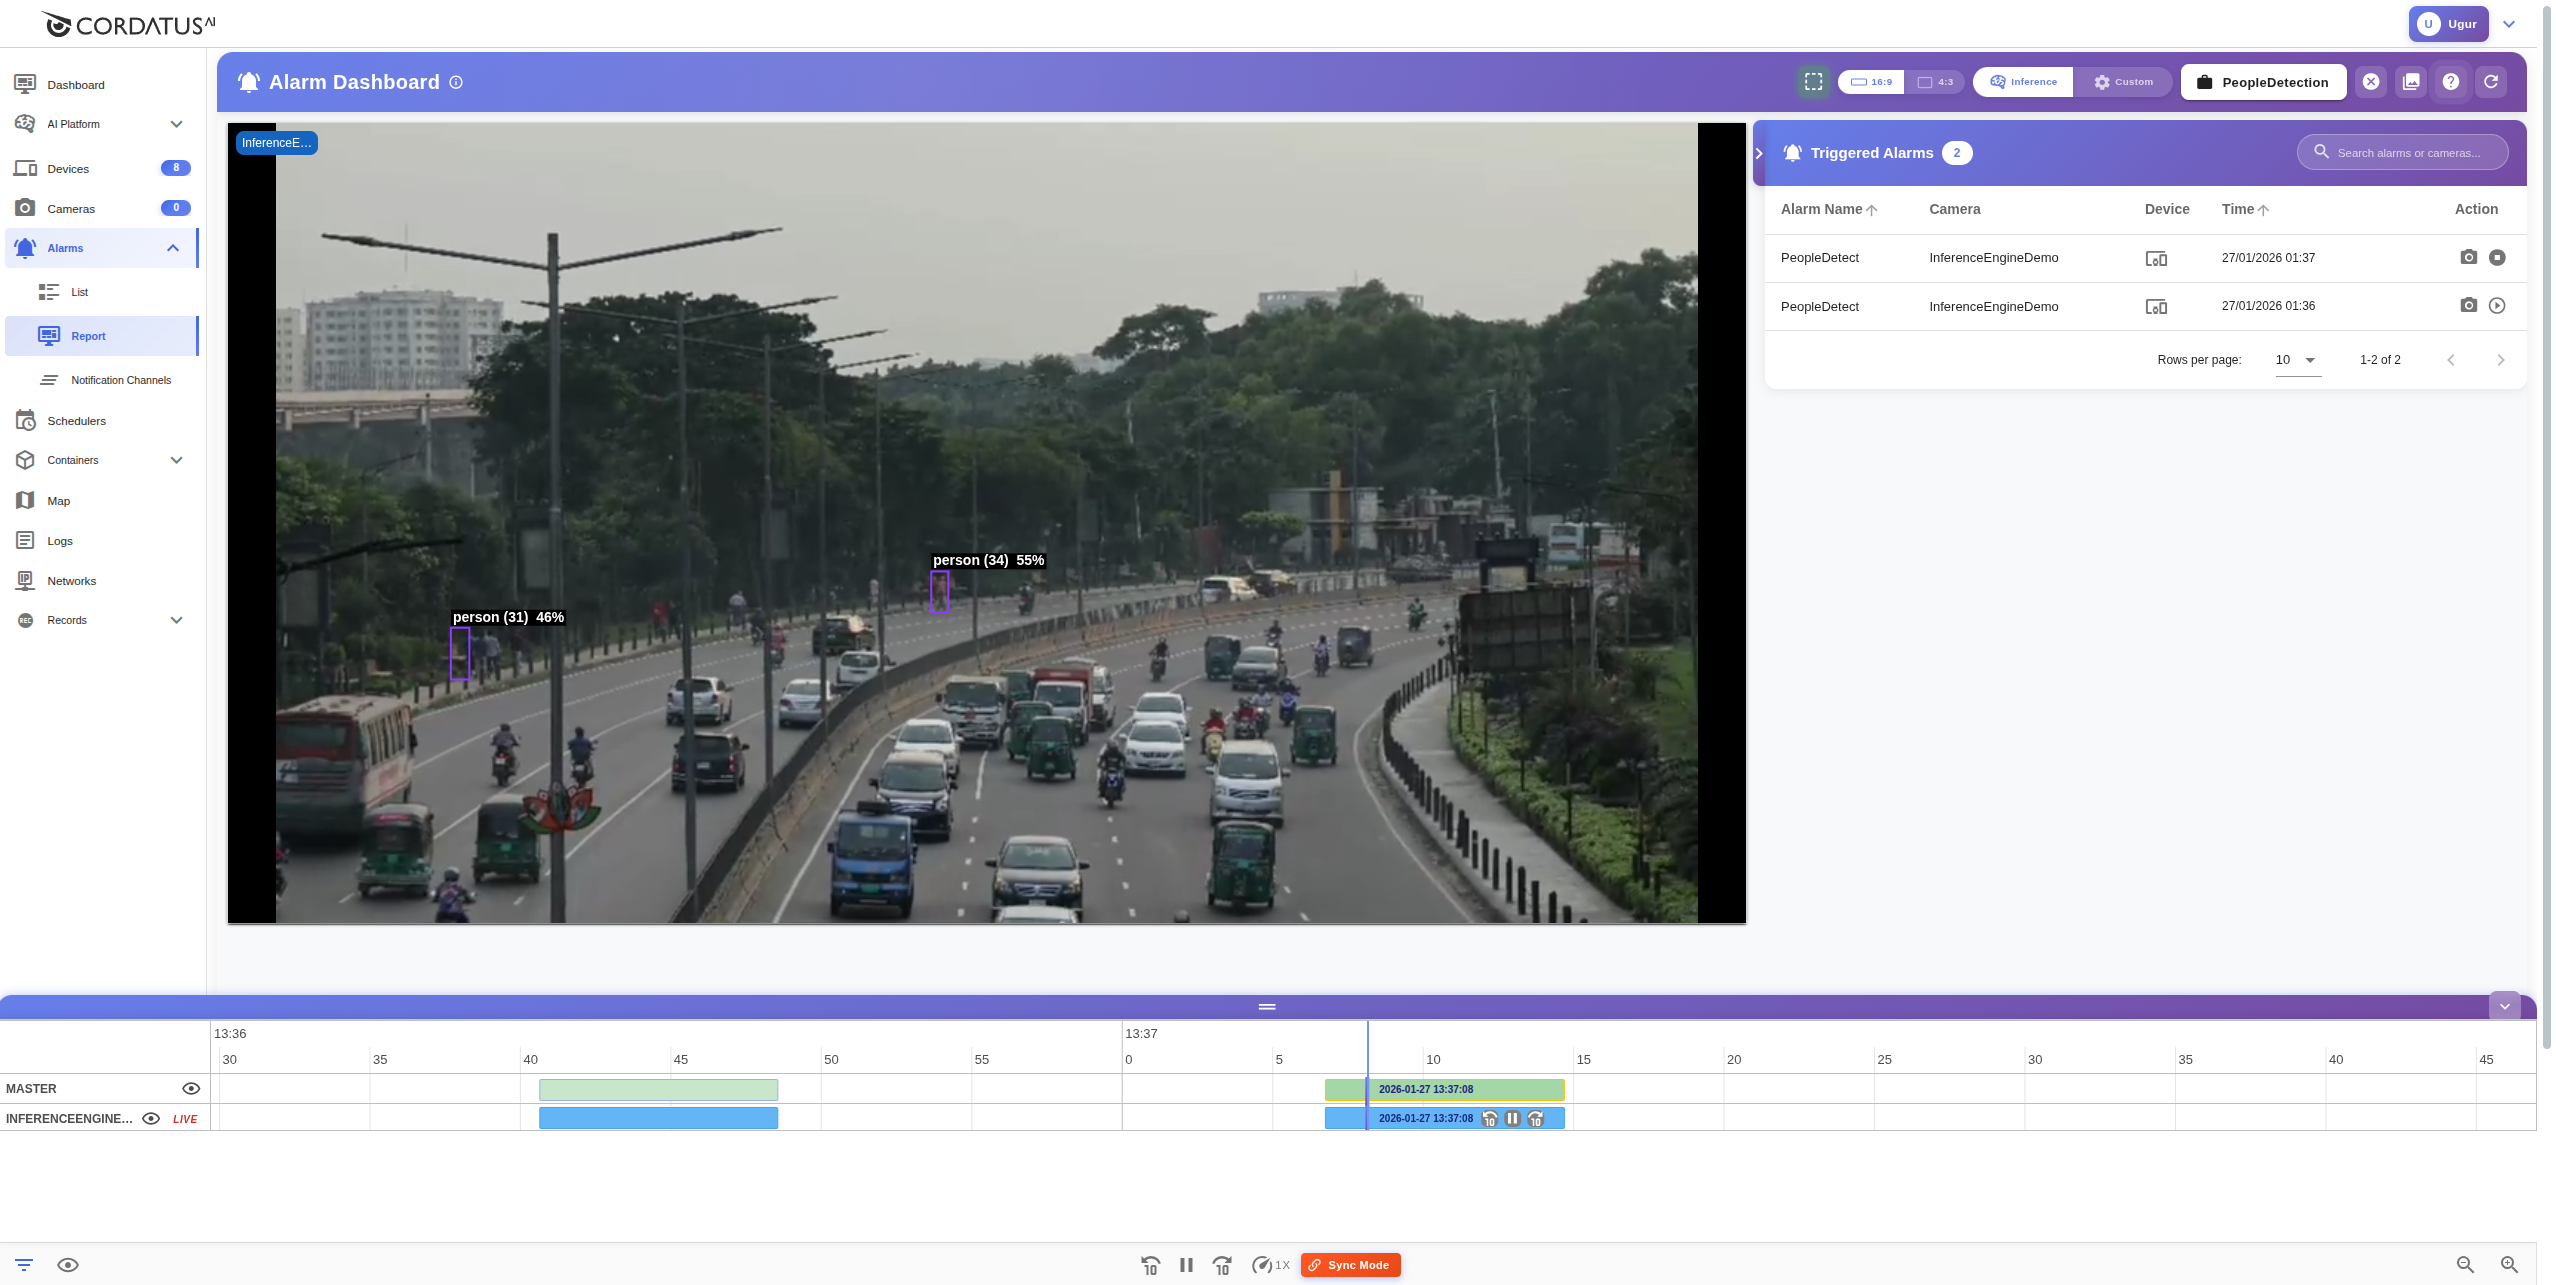
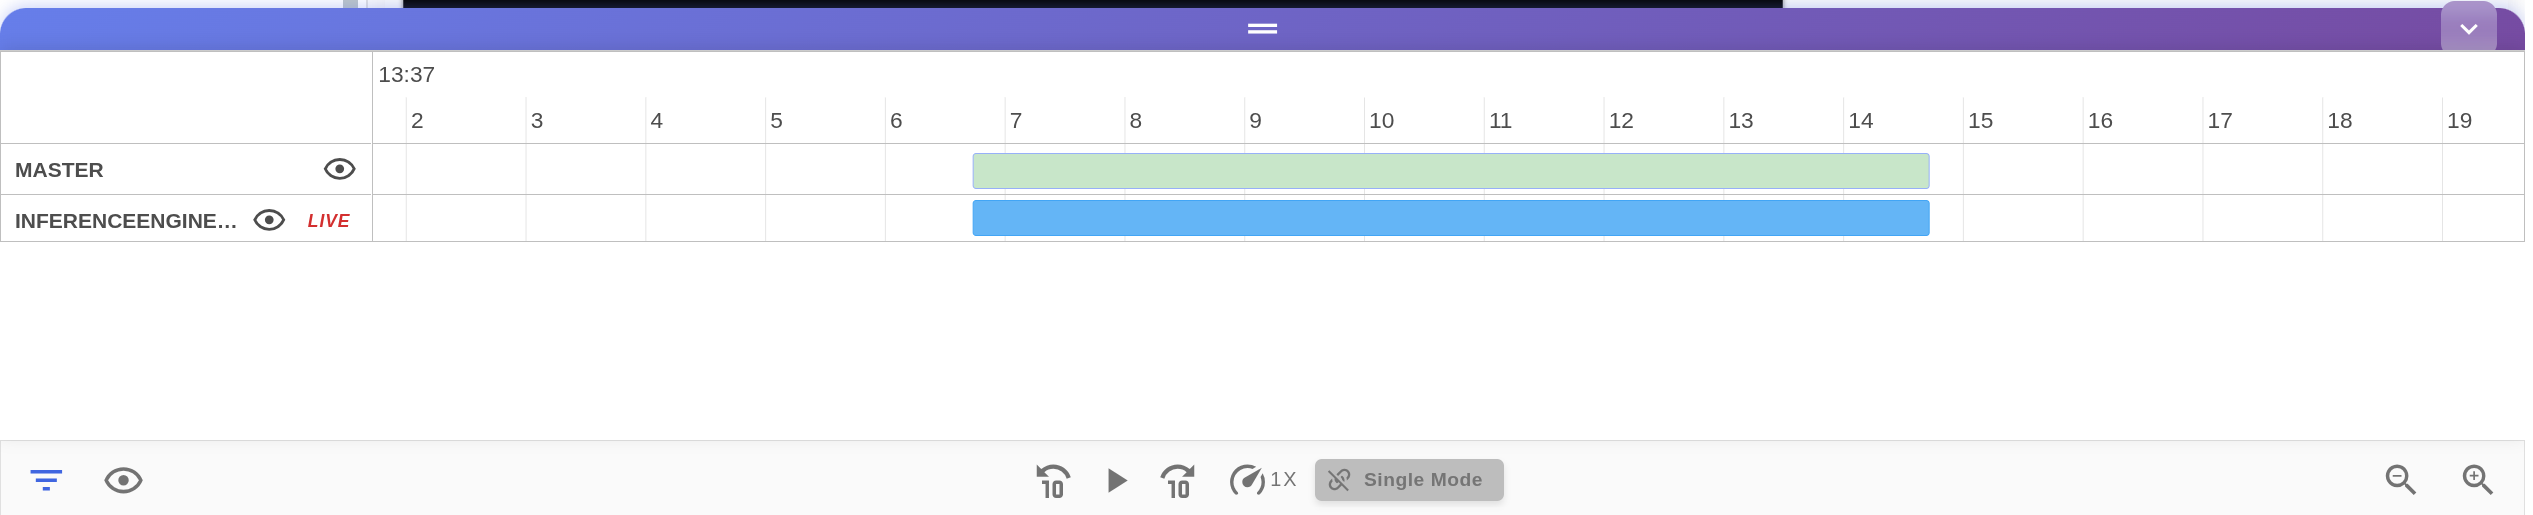
Timeline
Each alarm trigger moment is shown as a blue block on the timeline at the bottom.
Timeline features:
- Master Row: Combined view of all alarms
- Camera Rows: Separate alarm line for each camera
- Hover Preview: Alarm screenshot appears 0.3 seconds after hovering over a block
Timeline controls:
| Action | How to Do It |
|---|---|
| Play alarm recording | Click on the blue block |
| Go to time | Click on the point you want to go to on the timeline |
| Zoom | Select View Range (1h, 3h, 6h, 12h, 1d) |
| Hide camera | Click the 👁 icon |
Master Synchronization
When you click on an alarm block in the master row, Master Mode is activated:
- A pink/purple marker appears
- All cameras synchronize to the same time point
- All cameras with recordings at that moment play together
- You can watch the same event from different angles simultaneously
Exiting Master Mode:
- Perform manual control (play/pause, forward/backward)
- Click on a different alarm block
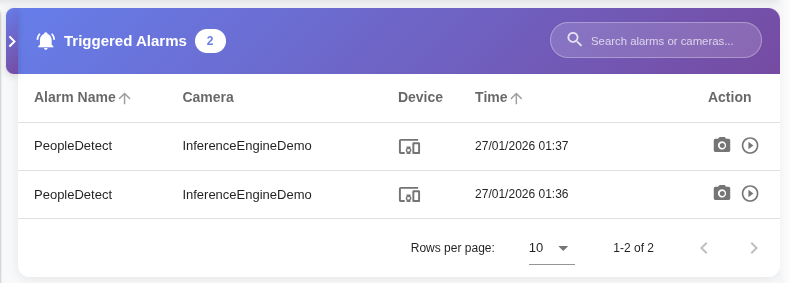
Alarm Table
The table in the right panel lists all alarms:
| Column | Content |
|---|---|
| Camera | Camera where the alarm was triggered |
| Alarm Name | Detection type (Person Detected, Vehicle Entry, etc.) |
| Date/Time | Trigger time |
| Screenshot | Small preview image |
Table features:
- Search: Filter by alarm name or camera name
- Sorting: Click column headers to sort by date or camera
- Quick playback: Click on a row to start the related recording
- Large preview: Screenshot enlarges when hovering over a row
Slideshow Mode
Use slideshow mode to quickly review a large number of alarms.
Starting Slideshow
Click on the 🎬 (slide) icon in the top toolbar.
Slideshow Controls
- Camera Filter: Select specific camera or "All Cameras" from dropdown
- Date Selection: Change day with date picker
- Alarm Counter: Current slide / total alarm count is displayed
Playback modes:
- Manual Mode: Control with forward/backward buttons
- Auto Mode: Automatic transition adjustable from 1-60 seconds
Navigation:
- Forward/Backward Buttons: Manual transition
- Thumbnail Bar: Jump directly to alarm from thumbnails at the bottom
Exit: X button in the upper right or Esc key
Video Playback Controls
Each camera's video player offers the following controls:
| Control | Shortcut |
|---|---|
| Play/Pause | Space |
| 10 seconds back | ← |
| 10 seconds forward | → |
| Full screen | F |
| Exit full screen | Esc |
Playback speeds: 0.25x, 0.5x, 1x, 1.5x, 2x, 4x, 8x, 16x
- Use slow speeds (0.25x, 0.5x) for detailed analysis
- Use high speeds (4x, 8x, 16x) for quick scanning
Tips
- Use Slideshow mode to quickly scan through many alarms
- Don't select more than 16 cameras at once for performance
- Prefer specific time periods instead of wide date ranges
- Lower playback speed to 0.5x for detailed review
- Keep AI drawings active to see detection details
- Use Master Mode to view the same event from different angles